Jan 23, 2012

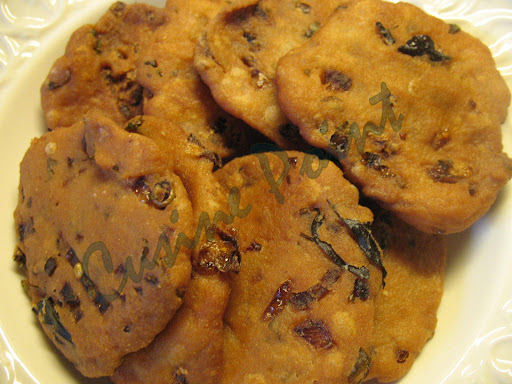
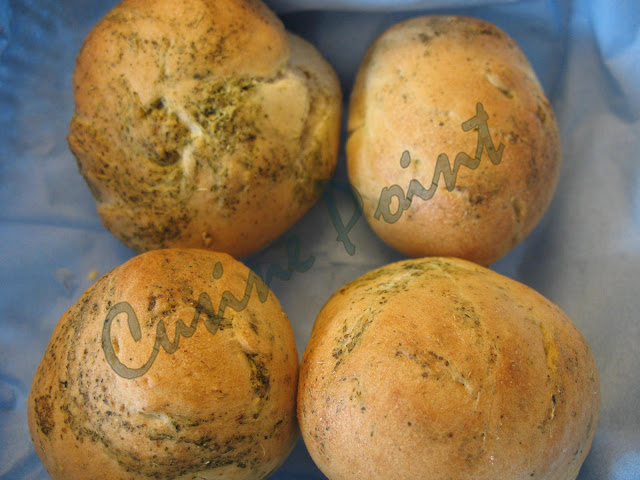
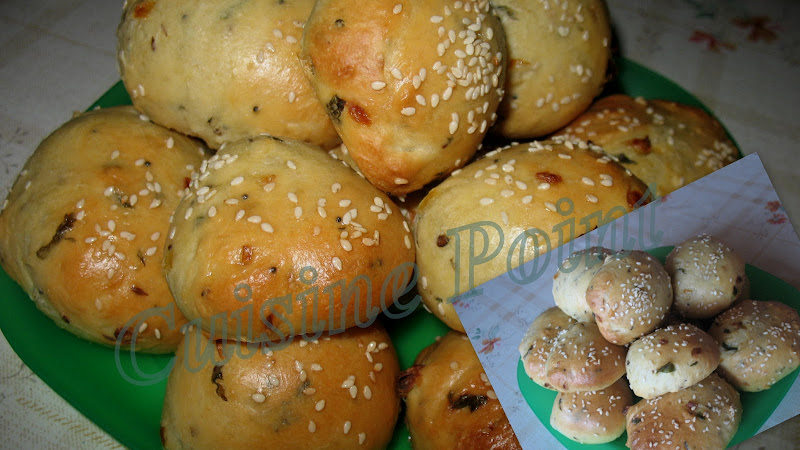
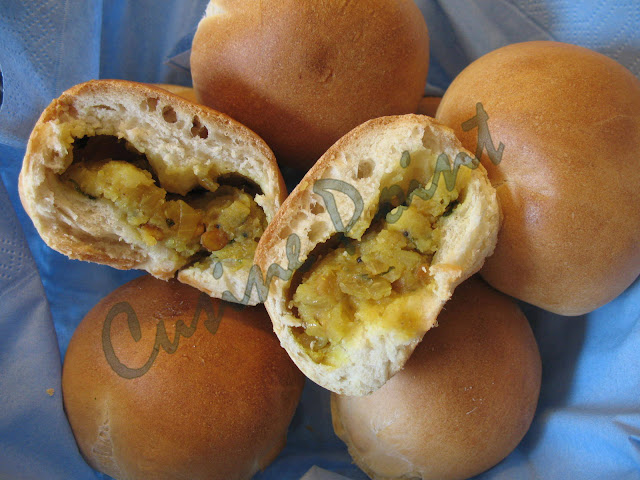
Khara bun

A very happy New Year to all my blogging friends. Our trip to Bangalore was short & sweet with both the little ones enjoying it to their best. But for us the most shocking experience was, the soaring prices of basic amenities. On the last day of our trip, we went out to an Iyengar bakery near our home. We relished on some Yummy vegetable puffs & palya buns. It was after a long time with lot of courage we ventured to eat out. Thatz when the idea of baking Khara buns stuck to me.

I'd a recipe from the blogging World readily available. I've so many new recipes in hand these days that I just have no time to try them. But taking it up as a challenge to get back to pre-parenting days to start blogging again. One of the recipes for Khara bun I came across was while Face booking :) LG posted it some time back; was very much determined to try it. Sunday was a gloomy day here & was some how trying to squeeze in time to prepare the buns. AmAr looked after all the routine cooking for the day & let me indulge myself into baking the buns.

LG's recipe using the bread machine is here. I don't have one. So I followed the recipe as LG suggested from her friend's blog. LG, believe me I would love to try the combination of Congress with the bun. I'll surely make Congress some other day.

Ingredients: -
For the dough: -
1 1/2 cups Maida
1 1/2 tsp active dried Yeast
1/4 cup Milk + 1 tbsp Milk, to brush the buns
1/2 cup Water
1 1/2 tsp Sugar
3 tbsp Ghee (2 tbsp for the dough preparation & 1 tbsp for brushing the buns after baking)
Salt
1 tsp Sesame seeds, Poppy seeds or Mustard seeds (The recipe says optional),to sprinkle over the buns

For Masala: -
a pinch Asafoetida
1 tsp Cumin seeds
1 tsp Mustard seeds
3/4 cup finely chopped Onion
4 Green chilies, finely chopped
Curry leaves, finely chopped
Coriander leaves, finely chopped
Salt
Oil

Method: -
1. Mix water & milk & microwave till Luke warm.
2. Blend in sugar & yeast to the luke warm milk. Set it aside for 10 - 15 minutes till the milk mixture becomes frothy. The yeast activates.
3. In a mixing bowl add 2 tbsp of ghee first, then 1 ½ cups of maida, salt & the activted yeast mixture.
4. Knead the dough. I used a hand kneader. Check the dough.
5. Add the other ½ cup of dough & adjust the dough. It should be little sticky.
6. Scrape the dough out of the bowl on to a clean working area.
7. Knead the dough by adding maida as required to make it non-sticky.
8. Make small pit in the center of the dough & place the Onion mixture.
9. Knead well so that the masala incorporates evenly into the dough.
10. Keep the dough covered in a warm place or in a sunny spot for a minimum of 2 hours. The dough doubles in quantity.
11. Punch the dough down & knead well.
12. Pre-heat the oven for around 10 minutes at 180 Deg C. I used the fan setting for both pre-13. heating & baking rather than using the broil setting.
14. Divide the dough into equal portions.
15. Give each portion a bun shape & place it on a butter paper (on a baking tray).
16. Using a pastry brush, brush each portion with Milk for the browning reaction / Maillard reaction.
17. Sprinkle Sesame seeds, Poppy seeds or Mustard seeds on each portion. Pumpkin seeds can also be used.
18. Place the baking tray into the oven & let the buns bake for 20 - 30 minutes.
19. Once the buns turn golden brown, remove from the oven & brush each one with the remaining table spoon of ghee. The recipe says, this is done to retain the color, smell & soft crust.
20. Serve warm or cold.

Onion Masala preparation: -
1. In a hot pan add 2 tsp of Oil.
2. Add a pinch of asafoetida & mustard seeds. Once the mustard seeds begin to crackle, add curry leaves, green chilies & turmeric. Roast for a few seconds.
3. Add finely chopped onion & little salt. Saute till the onion becomes transparent.
4. Remove from fire & garnish with finely chopped coriander & keep aside for cooling.

Dec 14, 2011

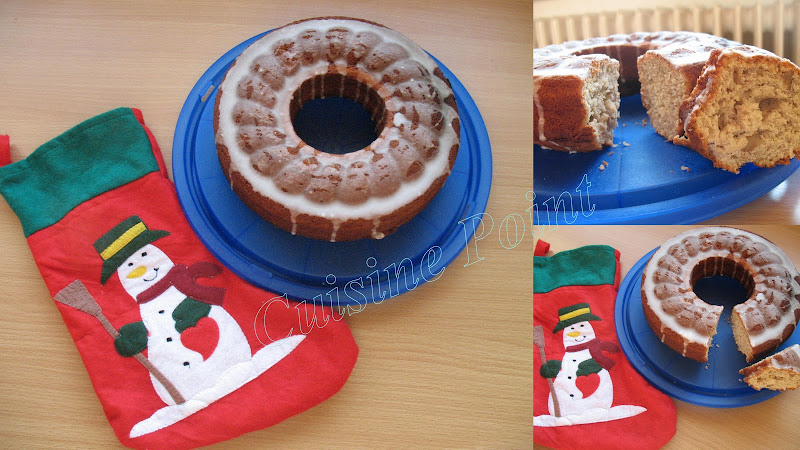
Banana Walnut Cake with Lemon icing

After seeing the previous post, realized it's been an year since the last post. I did bake the Spritz cookies this year too. After the arrival of our daughter Nidhi, I've become a very active mother, not spending too much time on the Internet. So blogging has taken a back seat. I've so many recipes to be published. They are sitting in the posts Queue as of now. I've a few cake recipes, which I need to publish, else will surely forget the way how I baked them.

I came across the recipe for the Banana Walnut cake on Facebook, posted by one of my friends. You can find it here. I'd two eggs about to hatch in the refrigerator if not used :). I went through the list of ingredients required to bake & I did have most of them except for buttermilk & brown sugar. This is my first recipe using brown sugar. So here goes my version.

Ingredients: -
1/2 cup Butter
1 cup white Sugar
3/4 cup Brown Sugar (Brauner Rohrzucker)
2 Medium sized Eggs (Egg white & York separated)
4 ripe Bananas (Puree before using)
1/2 cup Buttermilk
2.5 cups Maida
1 tbsp Baking powder
a pinch of Salt
1/2 cup chopped Walnuts
26 diameter baking pan is ideal for baking.

Method :-
1. Pre-heat the oven to 200 Deg C for about 15 minutes.
2. Grease the baking pan with butter & dust some maida in it.
3. Sieve Maida & combine it with baking powder & salt.
4. In a bowl, combine butter & sugar with the aid of a Hand mixer, till fluffy.
5. Add egg white & beat well. The mixture will fluff-up a little more. Then add the Egg York & continue to beat for another minute.
6. Add the butter milk & then the Banana puree & beat well.
7. In the end add the flour mixture. Using the mixer, beat the mixture well & then transfer half of it to the baking pan.
8. Add the chopped walnuts & pour the remaining half of the batter into the baking pan.
9. Bake it for like 30 - 40 minutes.
10. Let it cool down completely, if you wish to frost or decorate it. I used the simple Lemon icing.

Nov 25, 2010

Pound cake


It's Christmas time. I bought a new baking pan, which is in the shape of a Star. There came a recipe with it. So the final decoration is just my innovation to make it colorful.

Ingredients: -
40 g Cornflour
80 g Butter
80 g Sugar
100 g Maida
2 Eggs (Separate Egg White & Egg York)
1.5 tsp Baking powder
2 tsp Vanilla powder (Says the recipe. I dint use it)
1 tsp Vanilla essence (I added it)

I used a ready made icing, along with some Smarties (M n Ms) & colored chocolate bits.

Method: -
1. Pre-heat the oven to 180 Deg C for about 15 minutes.
2. Grease the baking pan with butter & dust some maida in it.
3. In a bowl, combine butter & sugar with the aid of a Hand mixer, till fluffy.
4. Add egg white & beat well. The mixture will fluff-up a little more. Then add the Egg York & continue to beat for another minute.
5. Next add the Vanilla essence, Backing power & Maida.
6. Using the mixer, beat the mixture well & then transfer it to the baking pan.
7. Bake it for like 40 - 45 minutes.
8. Let it cool down completely before you can start to decorate.

Nov 23, 2010

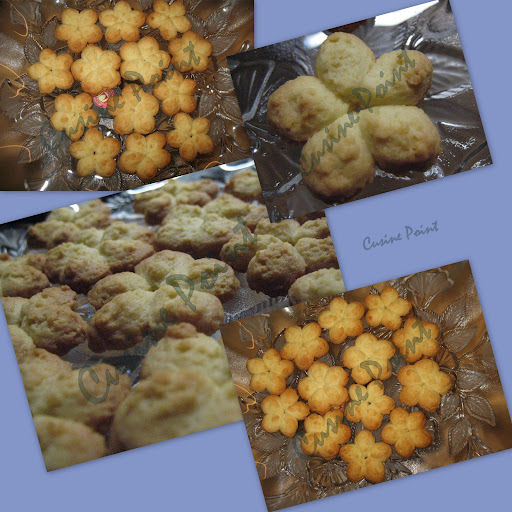
Spritz Cookies


I came across this recipe here while browsing for Christmas goodies to try this year. The recipe makes around 50 cookies. But I altered the recipe to make around 30 Cookies. Coming Sunday is the first Advent. So wanted to try something new, which Siddi can also enjoy. He doesn't like sweets at all. It's been hard to get him to eat fruits. So baked a batch of cookies with less sugar. The recipe surprisingly doesn't use baking powder or baking soda. This gave me an opportunity to use the new hand mixer & cookie press that I'd bought long back.


Ingredients: -
150 g Maida
115 g Butter
50 g Sugar
1 Large egg (Separate Egg white & Egg york for better results.)
1.5 tsp vanilla extract
1/4 tsp salt
Use all the ingredients at room temperature to make the cookie dough.


Method: -
1. Pre-heat the oven to 180 Deg C for about 20 minutes. Two cookie baking trays would be needed.
2. In a glass bowl beat the butter & sugar until fluffy using the mixer.
3. Add the egg white first & beat. This should make the mixture more fluffy. Now add Egg york & beat for a minute.
4. Add vanilla extract & beat well.
5. On low speed, add Maida & salt. Don't add Maida all at one, add it in gradually.
6. Fill the cookie dough & use the Star stencil.
7. Start pressing the dough through the press on to the tray with 1" space between each other.
8. Bake them for 10 minutes & check. If the tips of the cookies are light brown, its time to get them out.
9. Cool them on a wire rack.
For variation, one can add Orange essence or try the recipe without any essence.

Oct 1, 2010

Tandoori Roti

After almost 1.5 years taking some time out to start blogging again. My lil one is keeping me on my toes. So hardly get any time for blogging these days. I've been trying out new recipes every now & then. But can't blog.


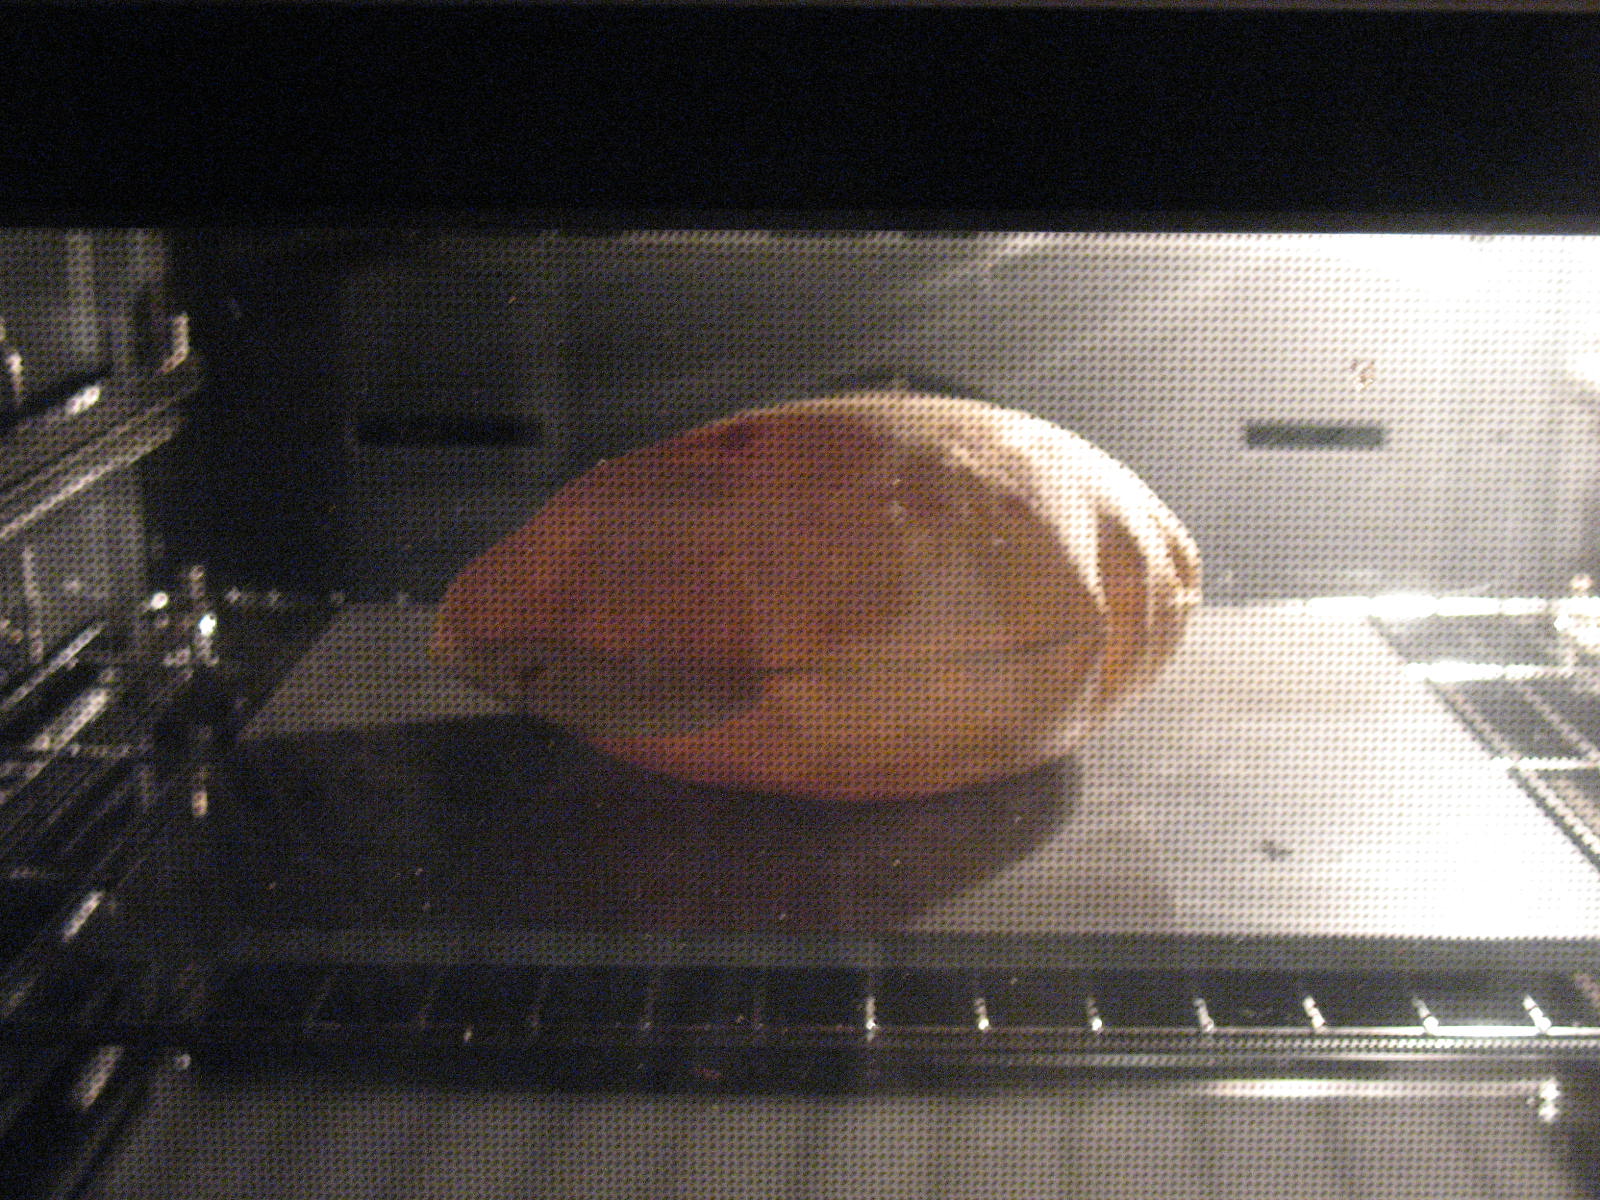
This is my first hand at baking Tandoori rotis. They turned out to be excellent. We enjoyed them for dinner with Shahi Gobi. I got the recipe from here.

Ingredients: -
1 cup Wheat flour
1/4 cup Maida
1/4 tsp Baking soda
1/2 tsp salt
1/4 tsp sugar
1.5 tbsp oil
1/4 cup Yogurt
Water
Ghee

Method: -
1. In a bowl combine both the flours, baking soda, sugar & salt.
2. Add oil along with yogurt & mix to make the dough.
3. Add water & make the dough smoother. Knead well.
4. Cover it with a damp cloth & keep it in a warm place for an hour. 30 minutes is what is recommended in the recipe given by Manjula aunty.
5. Pre-heat the oven to the maximum temperature with the baking stone in it for around 30 minutes. I set it at broil.
6. Divide the dough into 4 equal parts. The ingredients will give us 4 rotis.
7. Roll out the dough like Chapatis.
8. With wet palms, flip the rolled out dough & drop it into the oven on to the stone.
9. The roti begins to fluff up in a few seconds after its in the oven. Observe the color. It should turn golden brown.


10. Take roti out of the oven & brush it with ghee. Repeat the same with the other three parts of the divided dough.
11. Relish it hot with any side dish.
Forgot to take a photo of the final roti. We were very hungry :)

Jul 1, 2009

Fried Rice

Got some time to post the Fried rice recipe which I'd tried over the weekend. At the moment I've restrictive access to the Kitchen as my MIL does most of the cooking. She'll be getting a companion soon, (my mum) to deny me any access to the Kitchen till October.


This is a simple fried rice, which I cook quite often.

Ingredients: -
1 cup boiled Rice (Spread the rice on a plate & allow it to cool down completely)
1 medium sized green capsicum, finely chopped
1 medium sized carrot, finely chopped
1 medium sized onion, chopped into strips
1/2 cup sprouts
1/4 cup green peas
2 tbsp soy sauce
2 tbsp tomato-chili sauce
A bunch of 3-4 Scallions / Spring Onions (green leafy part & the onion part separated & finely chopped.)
Salt
Oil

Method: -
1. In a wok, heat 2 tbsp of oil & add onions. Saute till they start to sweat.
2. Then add all the other veggies & cook till they get fried evenly.
3. In a cup mix soy & tomato-chili sauce. Add little water & then drop it into the wok.
4. Mix well so that the sauce coats the veggies well.
5. Now add rice along with enough salt & fry for 3-5 minutes. If the oil has become less, add 1tbsp again.
6. Garnish with green leafy part of the spring onion & serve hot.

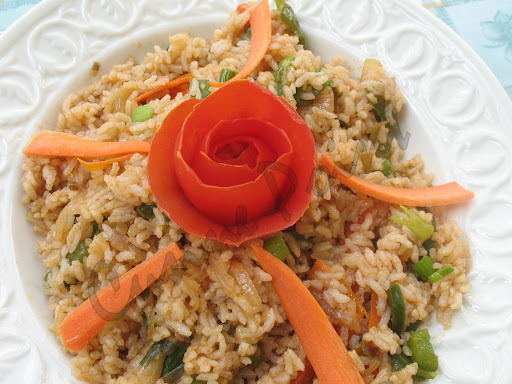
I made the red tomato Rose. This is my first try at vegetable carving. It was quite easy. I selected a round red tomato that was not too ripe. Then with the help of a knife, I started to peel the skin in a continuous strip. The strip was not even though. But it was OK. Then I carefully wound the strip to get the shape of a rose.

May 27, 2009

Bendekayi Majjige huli

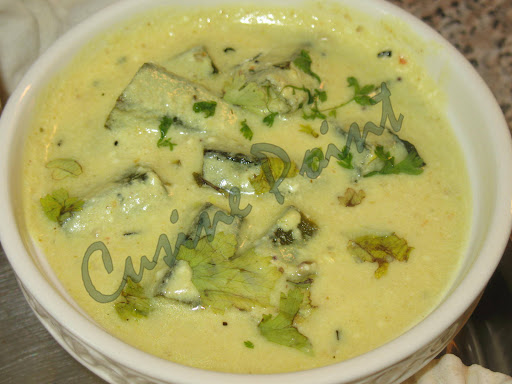
Recently my co-sister in Bangalore mentioned about this majjige huli. I forgot to ask her the recipe. After searching on the Internet, found a couple of them here & here. I referred to them, but made the usual way how I make the majjige huli.

Ingredients: -
15 - 20 bendekayi or Okras, washed, dried & cut in to 2" pieces.
1 tbsp besan
2 cups yogurt
1/2 cup grated coconut
1 tsp mustard seeds
a pinch asafoetida
10-15 curry leaves
2-3 green chilies
1 tbsp coriander seeds or dhania
1" ginger piece
1/4 tsp turmeric powder
Coriander leaves to garnish
Salt
Oil

Method: -
1. In a blender, add yogurt, grated coconut, ginger, dhania, green chilies, besan, salt & pulse well.
2. In a wok, add 1 tbsp of oil & heat on medium flame.
3. Add mustard seeds & when they splutter, add asafoetida, curry leaves & turmeric powder along with the Okra pieces.
4. Mix well so that each okra piece is well coated with oil. Add little salt.
5. Fry for about 5 minutes or till the threads formed on the okra pieces disappear.
6. Pour the beaten yogurt mixture into the wok.
7. Bring it to boil & then remove from flame.
8. Garnish with coriander leaves & serve hot with rice.

May 25, 2009

Adlak's recipe of Peanuts in Masala Gravy


As the name suggests, I got the recipe from Adlak's blog (Hema). It's the same excuse I've too :), no veggies at home & lazy enough to go out in this hot & humid weather. Thanks dear for the wonderful creation. It was great!

Ingredients: -
1 cup Peanuts, soaked for 5 hours & pressured cooked with little salt
1 medium sized onion, finely chopped
2 medium sized tomatoes, chopped
1 tsp jeera
1 tsp ginger-garlic paste
1 tsp amchur (I'm into eating lot of spicy & sour food these days)
1 tsp garam masala
1 tsp red chili powder
1/4 tsp turmeric
2-3 green chilies, slit lengthwise
Salt
Oil


Method: -

1. Prepare the regular Punjabi masala, using the onion & tomatoes along with the masala ingredients. Grind it to a fine paste.
2. Bring the gravy to boil by adding enough water. Now add the peanuts & let it cook till the oil starts to leave.
3. Garnish with coriander & serve with rotis or rice :).

May 21, 2009

Paneer Makhanwala

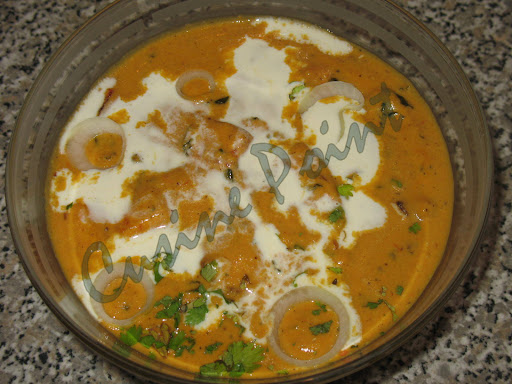
I was looking for new recipes online which use Paneer. I found a huge list of yummy dishes here. I decided to try Paneer Makhanwala. I found a few variations of the masala by different bloggers. I made it in my own style. It tasted yum finally :)

Ingredients: -
Paneer made out of 1 lt milk, diced
200 g cream
2 tbsp butter
1 big onion, finely chopped
3-4 medium sized tomatoes, cut into pieces or use tomato puree
2-3 green chilies, slit lengthwise
1 tsp ginger-garlic paste
1 tsp cumin
1 clove
1” cinnamon stick
2 black pepper corns
2 tsp garam masala
½ tsp turmeric powder
4-5 cashew nuts
1 tbsp Kasoori methi
Salt
Coriander leaves & onion rings to garnish

Method: -
1. In a pan, roast Paneer cubes to golden brown by adding 2 tbsp of butter. Remove & soak them in Luke warm water.
2. In the same pan (medium flame), add another tbsp of butter & add cumin seeds. When they start to splutter, add cinnamon, pepper corns & fry for few seconds.
3. Add onion pieces along with very little salt & turmeric powder.
4. When they begin to sweat, add cream, garam masala, cashew nuts, kasoori methi & tomato pieces. Give it a good stir. Allow the tomatoes to cook well & become tender. Remove from flame & cool.
5. Grind the above cooled mixture to a fine paste. Don’t add water.
6. In the pan, now add the roasted Paneer cubes along with the paste. Add little water if the consistency is too thick & bring it to boil. Add salt.
7. Allow the Paneer pieces to absorb the masala well. This should take around 5 – 10 minutes.
8. Remove from flame, garnish with coriander & onion rings. Serve hot with any Indian bread or rice.

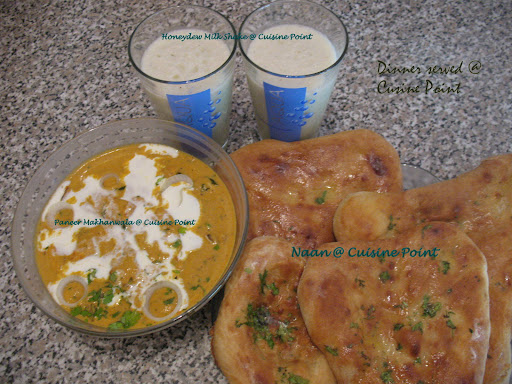
This was our dinner yesterday; Honeydew milk shake, Paneer Makhanwala with Naans.

May 20, 2009

Honeydew milk shake


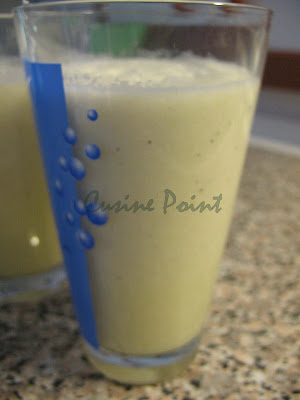
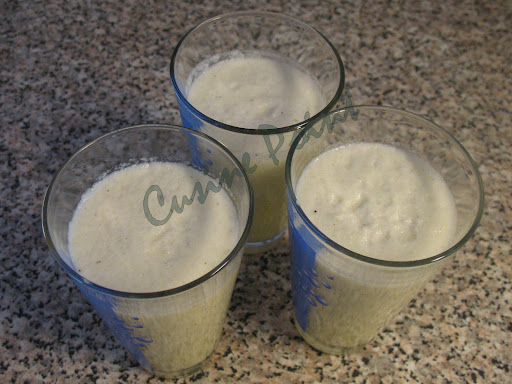
Its becoming unbearly hot & humid here. We are expecting rain during the weekend. Hopefully we'll have pleasent weather next week. Today is a holiday here. As AmAr would also be home I wanted to make some fresh juice or milk shake. Yesterday bought a big honeydew. So here goes the recipe I tried. I made it twice; yesterday night for dinner & today for lunch. :)

Ingredients: -
½ Honeydew melon
2 tsp honey
1 tsp cardamom powder
2 cups milk

Method: -
Grind all the ingredients in a blender or mixie. Add crushed ice & serve cold.
Optional: - Add a tsp of fresh lemon juice or amchur if you like it sweet & sour.

Ade Dose / Adai Dose

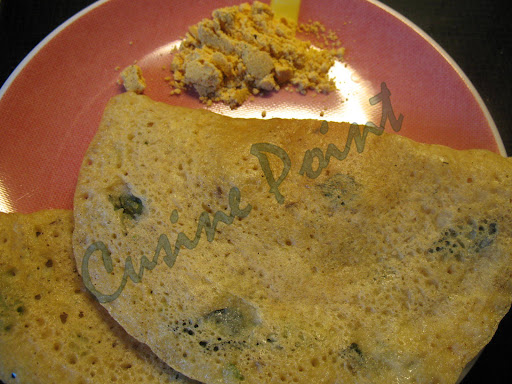
Ade Dose (Adai Dosi) is a delicacy from Tamilnadu, which has 2 or more lentils apart from rice in the batter. Its usually thicker & smaller in size than a dosa. I got the recipe from Mrs.Mallika Badrinath's Tiffin Varieties & here.

Ingredients: -
1 cup Raw Rice
¼ cup red gram dal
¼ cup Bengal gram dal
10 urad dal grains
2-3 green chilies, finely chopped
3 tbsp grated coconut
1 tsp jeera
1 tsp pepper powder
few Coriander leaves, finely chopped & curry leaves
Salt
Oil

Method: -
1. Wash the lentils & rice. Soak together for 4-5 hours.
2. Grind this soaked mixture along with the coconut gratings, chilies, jeera & pepper powder.
3. Add salt, coriander & curry leaves just before making the Adai.
4.Heat a tawa & pour a ladle full batter like a dosa.
5. Add oil around the adai & fry on both sides.
6. Serve with any chutney or chutney pudi (powder).

May 16, 2009

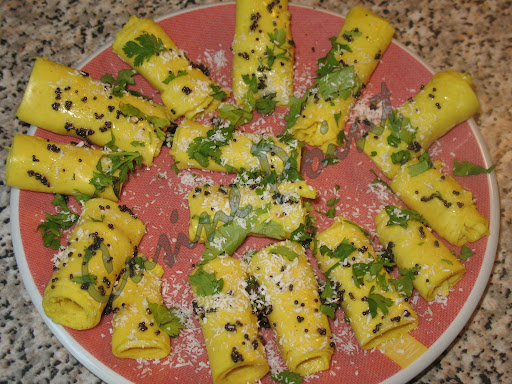
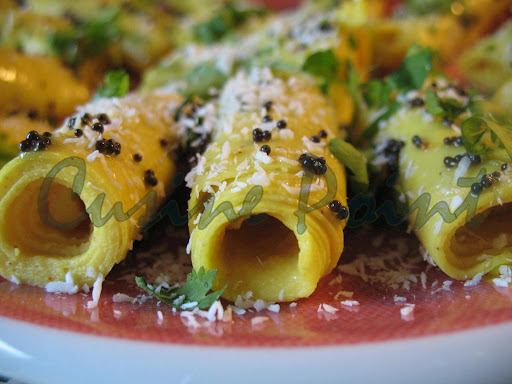
Microwaved Khandvi

This is the second recipe of Khandvi I tried. The first one is here. I got the microwave recipe from Showmethecurry.com. Thanks Hetal & Anuja for this easy recipe.

The ingredients given below would yield around 15 Khandvis, as shown in the picture.

Ingredients: -
½ cup Besan
½ cup yogurt
¼ tsp turmeric powder
½ tsp jeera powder
½ tsp red chili powder
1 tsp fresh lemon juice or 1 tsp amchur
1 tsp mustard seeds
2-3 green chilies
1 tsp sesame seeds
a pinch asafoetida
1 tbsp dry coconut powder (fresh coconut gratings can also be used)
Coriander leaves for garnishing
Oil
Salt
Water

Method: -
1. Sieve besan before using. Place around 3 aluminum foils ready to pour the batter once it’s cooked & is hot.
2. In a microwaveable bowl combine the sieved besan along with yogurt, turmeric & jeera powder, red chili powder, amchur, asafoetida & salt.
3. Add water slowly & by using a balloon whisk make a batter which is lump free.
4. Place the bowl in the microwave & cook for 1 ½ minutes.
5. Remove & use the whisk again to even out any lumps that might be present.
6. Place the bowl in the microwave for 1 minute. Remove & even out the lumps.
7. Check for the consistency of the batter. While whisking it, if a good amount of batter is sticking to the whisk, then it’s done.
8. Place some amount of the batter on the edge of the aluminum foil & using a spatula gently spread the batter by pulling it down.
9. Using a knife, cut 1” strips in the batter that is cooling. Let the batter cool for around 5 minutes; the longer the better.
10. To roll start from the thick edge & roll down. If it’s difficult, use the knife to give a slight lift initially.
11. Place the rolled Khandvis in a plate.
12. Prepare the seasoning by heating oil in a pan. Add mustard seeds & green chilies. Pour the seasoning on the Khandvis.
13. Sprinkle dry coconut powder & garnish with coriander seeds.
14. Serve it cold or warm it up in the microwave & serve warm.

May 13, 2009

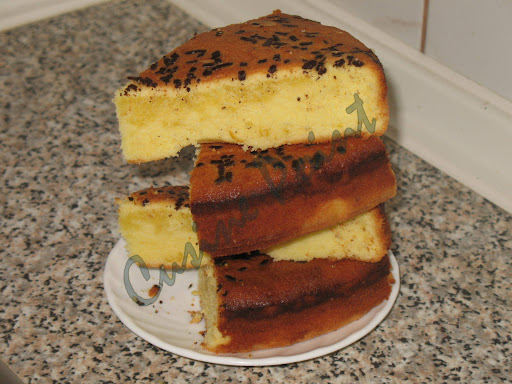
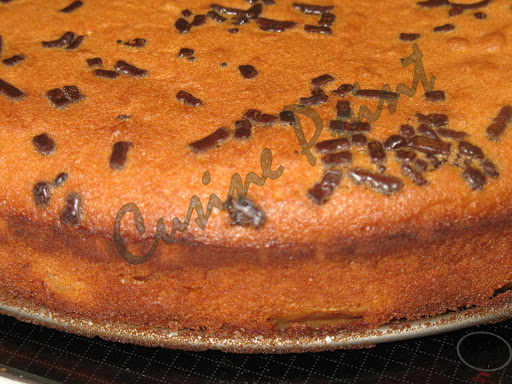
Sponge Cake


Sponge cake or pound cake as it's called is one of the simplest cakes to bake. It's called Pound cake as the ingredients that go into baking are usually around a pound in weight. It's called Sponge cake because after it's baked, the cake looks & feels like sponge, fluffy & soft.

Usually AmAr likes to have something spicy with tea when something sweet is served. So I also made Gobi Manchurian today.

Few observations I made today while baking: -

1. Butter & eggs have to be at the room temperature.
2. Beat the egg yolk & white separately. Fat content of the egg should not be beaten together with the egg whites.
3. Use the same quantity of sugar while adding it to the beaten egg yolk. Else the mixture will become watery. The egg white & sugar mixture should be stiff at the end.
4. When combining the egg yolk & egg white-sugar mixture, don't over mix. The aeration in the egg white - sugar mixture will be affected. This aeration is reason for the fluffiness of the Sponge cake.

Video Link you could refer: - http://www.videojug.com/film/how-to-make-sponge-cake

Ingredients: -

1 ¾ cups or 230 g Maida
2 tsp baking powder
1 cup or 226 g butter
6 large eggs (Separate egg yolks & egg whites)
1 cup or 200 grams powdered sugar
2 tsp vanilla extract
Zest of a large lemon (Optional)
1 tbsp fresh lemon juice (Optional)

Method: -
I use the Philips Cucina HR7638 to make the cake batter & knead dough for Naans or Kulchas.

1.Pre-heat the oven to 180 Deg C while preparing the dough.
2. Grease the rim of a 26 diameter baking pan & put a butter paper in the center.
3. Beat the egg whites at maximum speed till it becomes fluffy.
4. Add sugar a tbsp at a time to the running fluffy egg white mixture. Transfer it into a large mixing bowl, when done.
5. Beat the egg yolks till then become creamy. Add butter, vanilla extract, lemon zest & juice to the running mixture.
6. Combine this with the egg white-sugar mixture in the mixing bowl using a spatula. Don’t over mix. The aeration is necessary.
7. Pour the batter into the baking pan & bake for around 30 - 40 minutes.
8. Check if the cake is baked by using a tester or a fork.
9. Serve it as a simple Sponge cake or topped with fruits & jelly.

May 12, 2009

Maddur Vade


I saw the yummy vades which Anu had made. I was so very tempted to make them. She reminded me of the "n" number of Bangalore Mysore journeys which I'd taken part in either be with friends or family. Maddur is a small town in the Mandya district & is famous for the Maddur Vades. The batter for these vades is made using Onion juice instead of water. Hence it has a very unique taste.

Ingredients:-
½ cup rice flour
½ cup rave / semolina
¾ cup Maida
1 medium sized onion, finely chopped
½ tsp red chili powder
½ tsp jeera powder (optional)
½ tsp amchur (optional)
2-3 green chilies
a pinch asafoetida
2 strands of curry leaves, finely chopped
coriander leaves, finely chopped
Salt
Oil

Method: -
1. In a heavy bottom pan heat oil for deep frying & making the dough.
2. In a mixing bowl, combine maida, rave, rice flour, onion pieces, green chilies, coriander leaves, curry leaves, red chili powder, jeera powder, asafoetida & amchur.
3. Pour around 3 tbsp of hot oil to the above mixture.
4. With fingers tips mix the flour by adding water. Uniform thick dough should be formed.
5. Wet the palms each time doing a vada. Make balls & flatten to get the shape. Place them on butter paper or a banana leaf. Make the vadas thin. Else they wont get fried properly.
6. Deep fry in batches till brown on both sides.
7. Serve it hot or cold with any chutney.

May 8, 2009

Khara buns


One of my friends has been eagerly waiting for this recipe since April 25th. It was her birthday & I'd baked Khara buns along with Palya buns. I forgot to blog the recipe for Khara buns. Sorry for the delay. I got the recipe from LG's blog. I used the same ingredients that were used for making the Palya buns, without the stuffing.

Ingredients: -
2 cups maida
2 tbsp butter
1/4 tsp baking soda
1 tsp dry yeast (active yeast can be use to fasten the process. I dint have it)
1 tsp sugar
1 tsp salt
1 tsp oil
2 tsp milk

For the flavor: -
1 tsp Fennel (Saunf)
1 tsp jeera powder
2- 3 green chillies
2-3 pudina leaves (I used dry mint leaves)
Salt

Method: -
I used a food processor to make the dough.
1. Warm a cup of water & mix yeast. Let it sit for 10 minutes or till the mixture becomes frothy (activates).
2. In the mean while, make a dry powder with the flavor ingredients in a mixie.
3. In the food processor, add oil first, then 1 ½ cups of maida, baking soda, butter, milk, sugar, salt, the dry flavor powder & the yeast mixture.
4. Run the food processor at high for a minute & check the dough. Add the other ½ cup of maida & adjust the dough. It should be little sticky.
5. Keep the dough covered in a warm place or in a sunny spot in a steel container for a minimum of 2 hours. The dough doubles in quantity.
6. Punch the dough down & knead well.
7. Pre-heat the oven for around 10 minutes at 180 Deg C. I used the fan setting for both pre-heating & baking rather than using the broil setting.
8. Knead the dough well & divide it into equal parts.
9. Give a good round shape to each part.
10. Before placing into the oven for baking, coat / brush each bun with milk using a pastry brush. More about Milk washing here.
11. Baking usually takes 20-30 minutes depending on the oven.
12. Serve hot or cold with tea or coffee.

May 4, 2009

Buttermilk cookies

We enjoyed the long weekend thoroughly with great weather & a nice city, Prague. Back home now, saw a small carton of buttermilk sitting in the refrigerator since 3-4 days. I read about different baking recipes that use buttermilk.

Just before we left I'd submitted an entry to Click & was wondering what is the next they would come up with. This month's event is Cookies. So, I decided to bake buttermilk cookies for today evening's Tea. I got the recipe from Mandy's blog. The blog has some excellent baking ideas. I also referred to a recipe posted by Bahar.
This goes to Click's May 2009 - Cookies event.


Ingredients: -
1 ½ cup maida
¼ cup buttermilk
¼ cup + 1 tbsp unsalted butter
½ cup sugar
¼ tsp baking Soda
1 large egg
½ tsp vanilla extract
¼ tsp salt
Zest of a one big lemon (optional) I love it, so used it.

Method: -
1. Preheat oven to 180 Deg C.
2. In a mixing bowl sift maida, add baking soda & salt to it.
3. In food processor, cream butter & sugar till light & fluffy.
4. Add the egg & vanilla extract.
5. Add maida, to the food processor along with buttermilk & lemon zest. Run the processor at high for 3 minutes so that the dough forms uniformly.
6. The consistency of the dough was like the chapati dough. I rolled it & using a teaspoon as the cookie cutter, made small flattened cookies.
7. On a baking sheet, arrange them 1” apart.
8. Baking should take around 8-10 minutes depending on the oven. Also notice the edges. If they are lightly brown in color, remove from oven & cool on a wire rack.

Apr 29, 2009

Davanagere Masala Mandakki / Nargis Mandakki


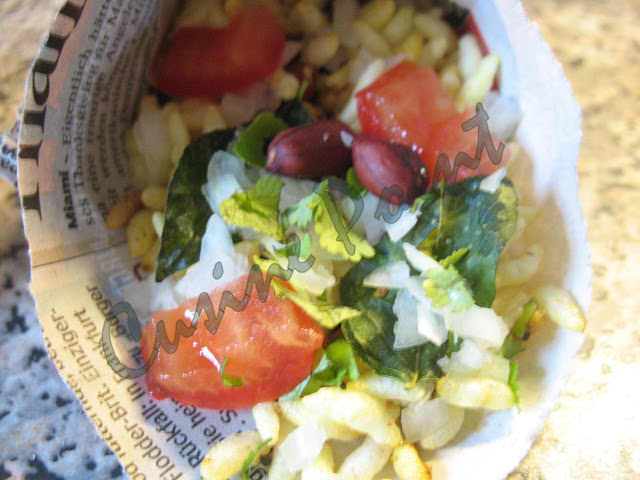
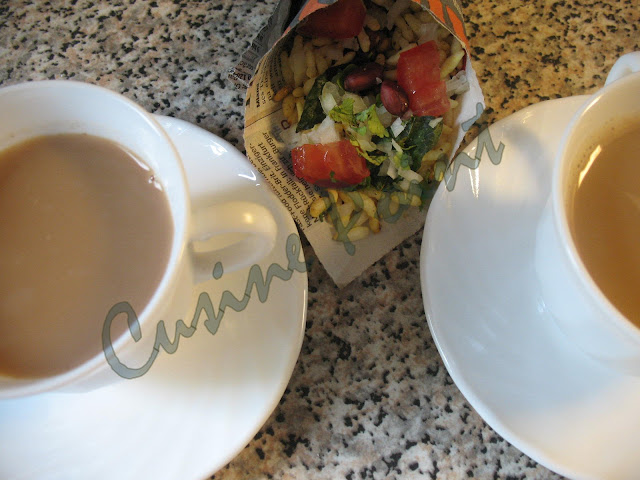
One more snack to satisfy by craving. For the first time in Germany I was surprised to see Mandakki puri/Mysore Puri being sold at the Indian grocery store. There are two types of puffed rice which I'm aware of; the one that is used to make puri unde (Sweet Puri-Jaggery balls), which is also offered to God during Ayudha pooja & other puffed rice used for making Masala Puri. Mysore puri / mandakki puri already has some amount of salt in it. But Bangalore puri is unsalted.

I got the recipe to make Nargis Mandakki here. After seeing so many photos of churmuri online, I was so much tempted to make it at home. I was imagining the taste of the masala puri mixed with vegetables! Hmmm yummy. I used to regularly have chaats on the road side in Bangalore, most of the time in Jayanagar 4th block. AmAr though was not such a chaat freak & would always advise on not eating out. :(

One can lightly saute the onion pieces & mix or use them raw. I like both though :)

Mandakki goes to Mahimaa's 15-minute cooking @ Spices.

Ingredients: -
2 lt Mysore puri
1 tsp mustard seeds
pinch of asafoetida
1/4 tsp turmeric powder
1/4 cup roasted ground nuts
1/4 cup roasted Bengal gram
1 medium sized onion, finely chopped
1 medium sized tomato, finely chopped
1/4 cup grated carrot [I dint have carrot at home :(]
2 green chilies finely chopped, else 2 tsp chili paste
curry leaves
coriander leaves, finely chopped
Salt
Sugar
Oil

Method: -
1. Heat 1 tbsp of oil in a pan & mustard seeds. When the seeds splutter add green chilies, asafoetida, curry leaves, turmeric powder, roasted ground nuts, roasted Bengal gram, salt & sugar along with the puffed rice.
2. Mix well & remove from flame.
3. Add onion & tomato pieces.
4. Garnish with grated carrot & coriander leaves.
5. Serve hot or cold.

Cucumber & totapuri mangoes can also also added.

Apr 28, 2009

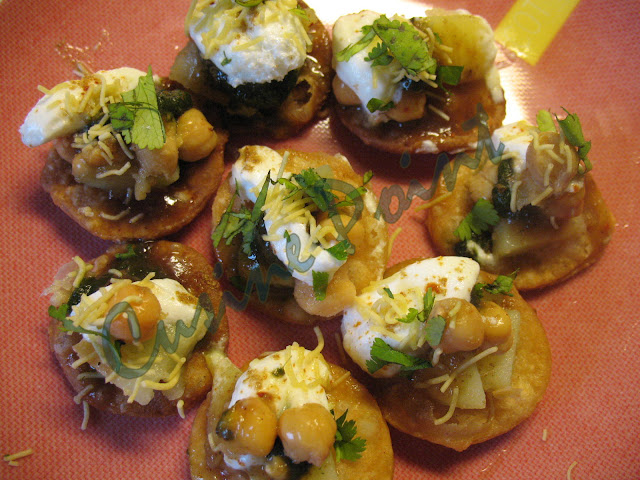
Papdi chaat

Papdi chaat was on my to do list since a long time. I'd a relaxing afternoon today to give it a try. Papdi chaat is easy to make if one has green / coriander & tamarind chutneys readily available. I made the papdis fresh at home.

Another entry to Pallavi's Sunday Snacks - Chaats event.


Ingredients:-
For the Papdis: -
1/2 cup Maida
4 tbsp Rava
1 tsp ajwain (optional)
Oil
Salt

For the Toppings: - You can add different varieties of toppings. The list below is what I like the most at the moment. :)
1 medium sized potato, chopped
1 medium sized onion, finely chopped
1 tsp jeera powder
1 tsp chaat masala
1 tsp red chili powder
1/4 cup curds
1/4 cup kabuli channa, boiled
Green chutney
Tamarind chutney
Sev
coriander leaves
Salt

Method: -
1. In a mixing bowl, combine maida, rava, oil, salt with enough water to get a uniform dough.
2. Wrap the dough in a damp cloth & let it sit for 15-20 minutes.
3. Heat oil in a frying pan on medium heat.
4. Divide the dough into 2 equal parts & roll them into big chapatis. With the help of a roller dough docker or a fork make small holes on top of these chapatis. This is done to prevent puffing of papdis like puris while they are being fried.
5. Cut small circles out of them with a cutter.
6. Wrap the small papdis in a damp cloth until they are going into hot oil.
7. Deep fry them in batches.

To serve: -
1. Place the papdis in a serving plate.
2. Top each of them with a potato piece, few onion pieces, chickpeas mixed with green & tamarind chutneys, chaat masala, little salt, red chili powder, jeera powder, curds & in the end with Sev.
3. Sprinkle coriander leaves as well.

Apr 27, 2009

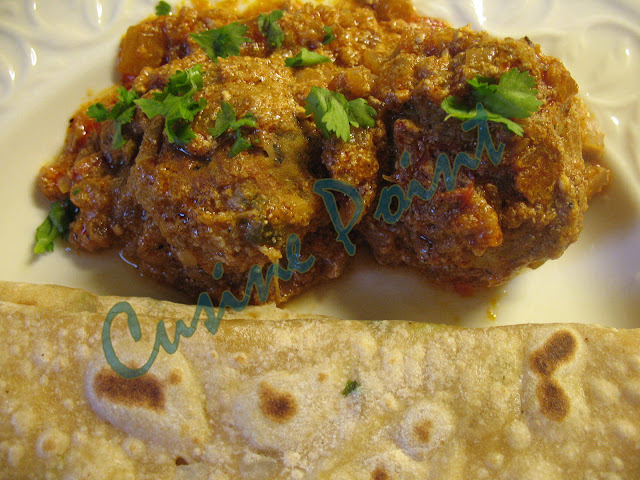
Lauki Kofta curry


Usually this vegetable was not brought home in my childhood. After I came here because of the less options we've, AmAr generally bought Lauki quite often. I ended up making the regular palya or sabji. He likes it very much. I don't like it so much & always find a reason not to cook it :) This time, I really wanted to try something new & not serve the same old boring palya. I looked for the options I'd. Kofta curry was shown on youtube by Anuja & Hetal. Their recipe impressed me because they din't fry the koftas the usual way, but let them cook in the gravy. I'll post later if this really was a good idea or not.

Ok, we did like it. Next time I would try frying the Koftas. Then probably I've have a comparison.

Another entry for Easy Craft's Side dish event.

Ingredients: -
Lauki, peeled & grated (They say 4 cups, mine came upto around 1 cup after removing water)
3/4 cup besan
1 big onion, finely chopped (1/2 of it used for the gravy & the other 1/2 for the koftas)
2-3 tomatoes, finely chopped
2-3 green chilies, finely chopped
1 tsp ginger-garlic paste
1/2 tsp turmeric powder
1 tsp jeera powder
1 tsp dhania powder
1 tsp garam masala
1 tsp amchur
1 tsp red chili powder
1/4 cup curds
coriander leaves, finely chopped
Salt

Method:-
1. To the grated lauki, sprinkle little salt & keep aside. Set aside till the gravy is ready.
2. In a heavy bottomed pan add 2 tbsp of oil & heat.
3. Prepare the gravy by adding onions. Saute them for a minute or two, till they start sweating. Add little salt to fasten the process as they say.
4. Add in ginger-garlic paste & mix well.
5. Add all the dry powders (turmeric powder, garam masala, jeera powder, amchur, red chili powder, dhania powder) & give the mixture a good stir.
6. Add the tomatoes & let it cook till they become tender on medium flame. Close the pan.
7. Add water & check the consistency. Allow the gravy to boil on low flame. They say boiling is important else the koftas will break when they cook in them later.
8. Prepare the koftas in the meanwhile. Squeeze well to remove water from the grated lauki.
9. Add besan to it accordingly. Besan acts as the binding agent.
10. Add onions, green chilies, red chili powder, amchur, garam masala, jeera powder, dhania powder & coriander leaves & mix well.
11. Add salt at the end, just before adding the lauki into the gravy.
12. Check to see if the gravy is boiling. Make balls/koftas out of the lauki & masala mixture & drop them into the gravy. Make sure they immerse well.
13. Cook on medium flame for about 5-10 minutes till the koftas are soft.
14. Garnish with coriander & serve hot with any bread or rice.

Apr 26, 2009

Palya Bun / aloo bun


Any Bangalorean would love to relish palya buns & khara buns from Iyengar bakeries. I miss them here. After much of a thought which recipe to use, which would be simple enough for me to try without much stress, I came up with the one below. I'd referred to the following blogs: -
LG, Pushpa, Asha, Aayi & Tanna.

Another important thing I learnt about Baking is about Egg wash & milk wash. LG mentions in her post about milk wash. I wanted to know more about the same. So googled & this is what I found.

Milk wash is used to encourage browning. In case of scones (kind of buns) & biscuits will be pale on top (even though the bottom side is brown) if not brushed with milk or cream before baking. Dairy products contain both amino acids and certain types of sugars that react with one another in the high heat of the oven & undergo the Maillard or browning reaction. This process creates the golden color that can be seen, but more important, it develops the savory flavor of browned food.

Ingredients: -
2 cups maida
2 tbsp butter
1/4 tsp baking soda
1 tsp dry yeast (active yeast can be use to fasten the process. I dint have it)
1 tsp sugar
1 tsp salt
1 tsp oil
2 tsp milk

For stuffing/palya: - Click here. Instead of chopping the onions lengthwise, I chopped them finely.

Method: -
I used a food processor to make the dough.
1. Warm a cup of water & mix yeast. Let it sit for 10 minutes or till the mixture becomes frothy (activates).
2. In the food processor, add oil first, then 1 ½ cups of maida, baking soda, butter, milk, sugar, salt & the yeast mixture.
3. Run the food processor at high for a minute & check the dough. Add the other ½ cup of dough & adjust the dough. It should be little sticky.
4. Keep the dough covered in a warm place or in a sunny spot in a steel container for a minimum of 2 hours. The dough doubles in quantity.
5. Punch the dough down & knead well.
6. Pre-heat the oven for around 10 minutes at 180 Deg C. I used the fan setting for both pre-heating & baking rather than using the broil setting.
7. Knead the dough well & divide it into equal parts.
8. Roll each ball like a poori & place a spoon of the playa / stuffing at the center. Cover it from all sides & give it a nice round shape.
9. Before placing into the oven for baking, coat / brush each stuffed ball with milk using a pastry brush.
10. Baking usually takes 20-30 minutes depending on the oven.
11. Serve hot or cold with tea or coffee.